Kapitan Schwartz was intent on the coming action. Ever since the last engagement he could think of nothing other than striking back at the Albionians. The first two serious battles of the campaign had resulted in the almost complete loss of his unit. The invasion was briefly halted and a counter attack was imminent. Aerial reconnaissance had seen a build-up of troops near a river. Schwartz was now on his way to take control of a likely set of river crossings that the enemy might use.
In the first two engagements, I used a variant of One Hour Wargames called ‘Up the Blue’. I will almost certainly use these again in the future but wanted to take another old set out for a spin, Bob Cordery’s Portable Wargame. These rules are an almost direct descendant of Joseph Morschauser’s 1960s modern rules which some readers will know about. Changes were made to the grid. These would now use a 4” square. Also, PW includes a card based system to decide how many units can move. Finally, instead of an option using hit points, I would use the more ruthless ‘instant death’ option where units could be removed at a stroke. I apologize if I assume too much knowledge of the rules, but I know many readers already have copies. I hope others will enjoy the narrative. Once again, I am using the OHW scenarios, this time number three, Control the River.
Forces
Teutonian: Kapitan Schwartz (6 points), 3 infantry units (12 points), 1 mortar unit (2 points), 1 machine gun unit (2 points), 1 tank unit (3 points) = Total 25 Points. Exhaustion level 3.
Albionians: Captain Scarlett (6 points), 3 infantry units (12 points), 1 mortar unit (2 points), 1 machine gun unit (2 points), 1 anti tank gun unit (2 points) = Total 24 Points. Exhaustion level 3.
A note on exhaustion points. Instead of a fixed number of turns, the battle continues until both units have lost half their number of units.
Turn One
Both sides were advancing from the northern and southern side of the river trying to beat each other to the crossings. This could be a violent and bloody encounter. A two of diamonds started the battle by giving Scarlett the ability to activate two units. One platoon was despatched to make a swift advance on either crossing.

The Albionians creep onto the field
Turn Two
A four of spades however meant that our friend Schwartz was able to launch even more men in the direction of the river. The tank unit made its way over the open ground on the west side with infantry support, whilst an infantry unit with a machine gun section skirted the woods to the east.

The Teutonians advance boldly
Turn Three
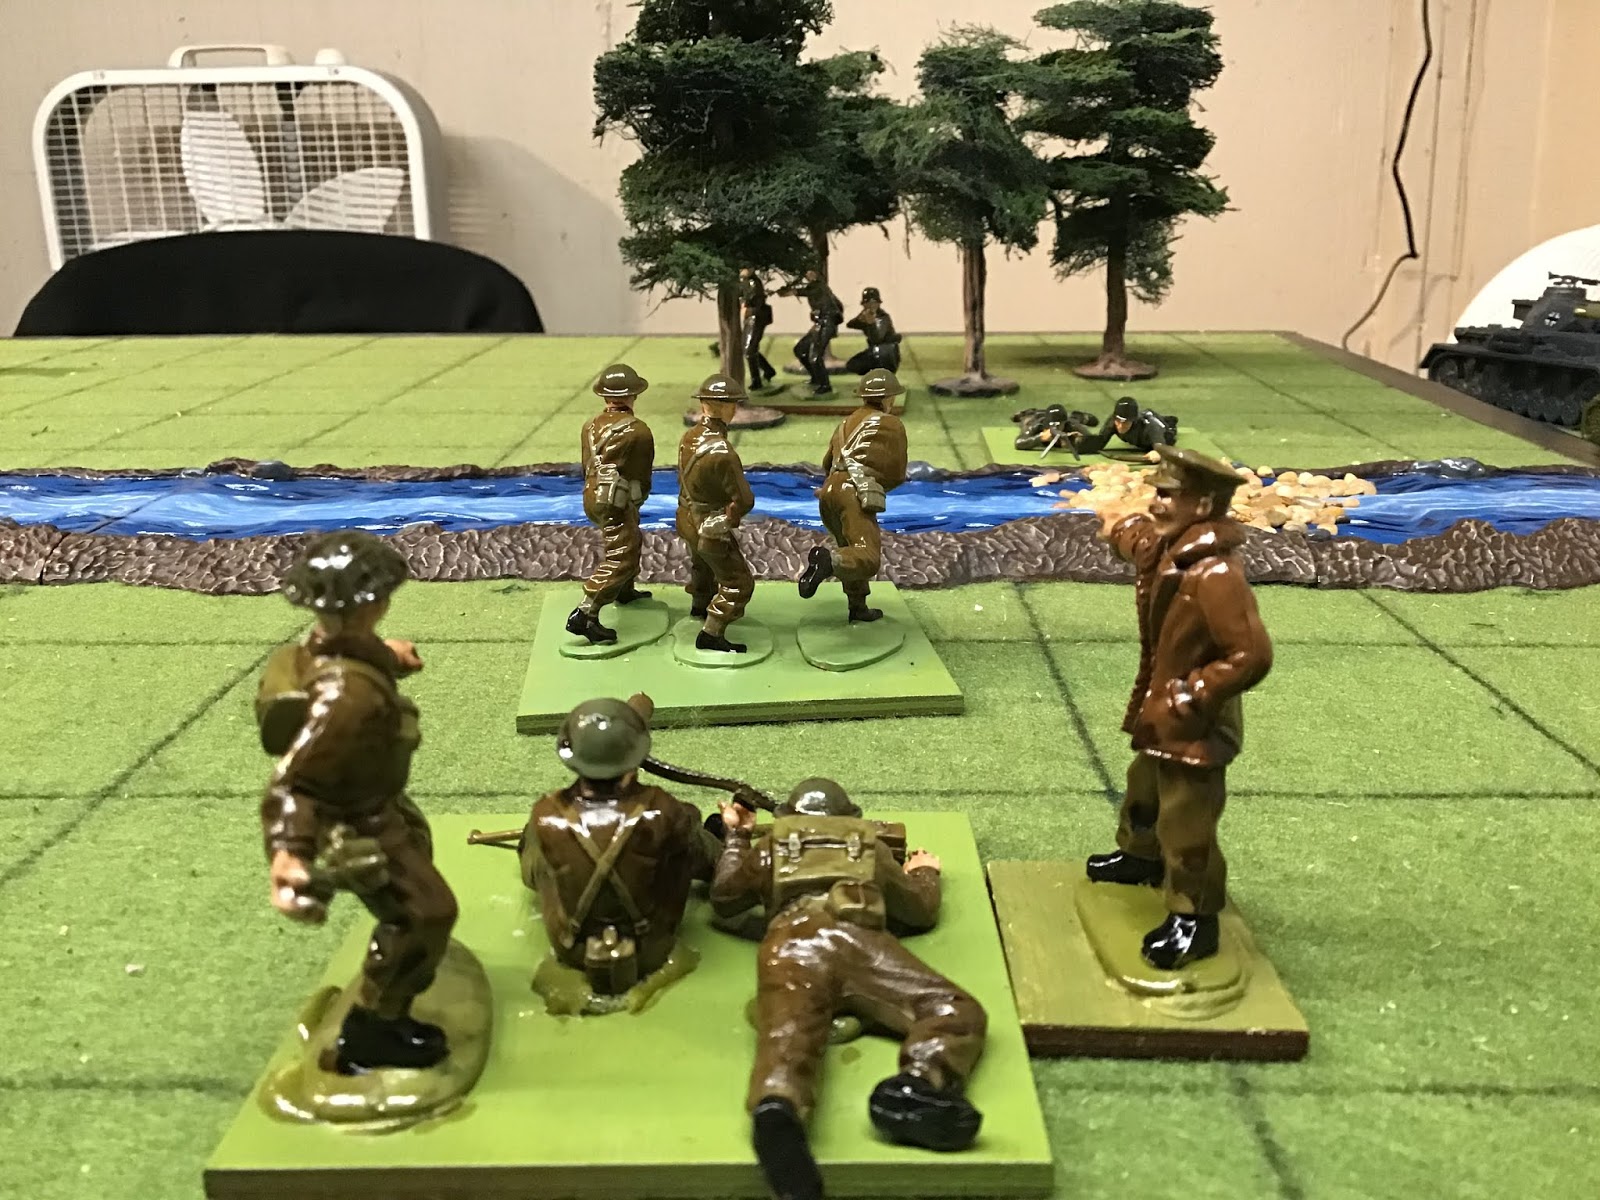
A two of spades. Schwartz had a difficult choice. He could urge the vanguard on or wait for the rest of his force to catch up. In the distance, the enemy appeared weak. Could he gamble on things staying that way? The lead tank commander decided the issues yelling “tanks forward”. The lead vehicle waded into the shallow water with the infantry following closely behind. This was a good start. Hopefully nothing bad would happen as the tanks could not fire as they crossed the ford.

The Teutonians armour splashes towards the enemy
A Joker forced a reshuffle and the next card was a two of hearts. Scarlett immediately heard that an enemy tank troop were advancing across the river. The anti-tank section were immediately despatched to the hill overlooking the river. In the meantime, the infantry would have to try and hold the enemy up as best they could. 1st platoon worked their way close to the ford and engaged with their anti-tank weapons. Albionians roll a 4, Teutonians roll a 1-1 for being the ford. Fortunately, the Albionians were nothing but a mischief, but nevertheless problematic.

Only to be held up...
A three of hearts meant that now Scarlett could engage the Teutonian armour with his AT gun and allow the infantry to withdraw. A roll of 1 however pathetically missed. The infantry might as well have stayed. Meanwhile 2nd platoon advanced closer to the other ford.
Turn Six
A four of diamonds. The anti-tank guns once more tried to drive back the enemy tanks (1 + 1 for firing at the same target) but with no effect. 1st platoon was sent back to the river bank (D6 of 2 v D6 of 3-1) however failed to dislodge the Teutonians from their bridgehead. At this point, 3rd platoon and the mortar section arrived ready to support either of the other two platoons.
Turn Seven
A two of clubs. Finally. The tanks and 3rd platoon (for such they were) made an effort to force their way across. 3rd platoon set up positions to fire on the opposite bank (D6 of 2, why bother?). The Teutonians attacked (D6 of 3-1 vs D6 of 5!). The hapless Teutonians were soon balling out of their vehicles unde a hail of anti-tank rockets and bullets. At least one tank drove into the deeper water where it stayed for the next seventy years until it reappeared on a YouTube video.

And go into ignominy...
A two of diamonds. Scarletts 1st platoon dashed along the bank to engage the Teutonians opposite (roll a 6 and a 2 for effect) the enemy infantry dispersed under the heavy fire. Scarlett took this opportunity to bring up the machine gun section with himself.

Captain Scarlett looks important
A four of spades. A furious Schwartz urged his men on both at the eastern ford and where his tanks wallowed. The machine guns dashed through the dense woods and set up facing the ford and put the enemy guarding the southern side under fire (3D6 5, 5, 1 with two 1s for effect), who were either cut down or dispersed. 1st platoon then sharply moved towards the ford. Meanwhile Schwartz personally led 2nd platoon and the mortar section to repair the damage at the western ford.

Schwartz makes a last effort
Turn Ten
A three of spades. The Teutonian machine guns and 1st platoon moved down to the banks of the river. This was risky as the Albionian machine gun section was on the other side. However, first platoon were able to drive them back (D6 of 5 and 4 for effect) with Scarlett chasing after them. Meanwhile, Schwartz sent his mortars up to bombard the Albionians opposite (D6 of 6 then a 4) which forced them to retreat.
Turn Eleven
A four of hearts. Scarlett immediately began rallying his force against this sudden spirit of aggression by the enemy. To begin with, he ordered his own mortars forward to fire back (D6 of 1 no effect). 1st platoon pulled themselves together and returned and using long range effective fire. The Teutonian mortar crews hastily retreated but in the confusion lost much of their equipment and were no longer effective. Meanwhile, Scarlett urged his machine gun section into action and they soon had their tormentors in their sights (3D6 6, 6, 1 followed by a four and six) forced the Teutonian infantry back into the woods. 3rd platoon leapfrogged and sniped against the Teutonian machine guns who were in the open but with no effect (D6 of 3).

Turn Twelve
A three of clubs. The Teutonian machine guns pulled back to the woods alongside their 1st platoon who were skulking amidst the Larches. They defiantly brought the enemy under fire but with no effect.
Turn Thirteen
Three of diamonds. The plucky lads of 1st platoon splashed into the ford. The mortar team set up behind them and gave covering fire (D6 of 1...yay). 2nd platoon shuffled towards the East ford.

1st platoon cross the ford
Turn Fourteen
Two of spades. Schwartz and his men were not going to give up without some resistance. Deadly fire directed personally by Schwartz cut down most of the men of 1st platoon as they tried to climb the northern bank of the river. The machine guns in the wood also fired at the bank opposite with little noticeable effect (they rolled a 1).

Schwartz’s last stand. I think not.
Turn Fifteen
A joker reshuffled the pack and the last card drawn was the two of diamonds. The Albionian mortar section laid down deadly accurate fire on Schwartz and his men (D6 of 3, D6 of 3 for effect equaled destroyed). But once again, Schwartz was able to escape. The failing light meant that further action had to stop. But it was clear that the Albionians had control of the river crossings.
The remaining Teutonians hide in the woods
Unlike the other two battles, there was no dramatic crescendo or last stand. The card system ensured that whatever action was taken would be uncertain, wondering if the next card would allow that side to bring up enough units to make the push over the river. Under PW, can only move out of the river ford on their next turn and can’t fire. Therefore, crossing was a deadly business here. In this game, units were destroyed in the fords because they could not retreat. I wonder what others think Schwartz should have done?
I would like this moment to thank Bob Cordery of Wargaming Miscellany for his encouragement down the years and of course The Portable Wargame which you should buy along with all his other books.
Great game Steve. Card driven initiative can bring some nasty surprises! Fantastic old figures and I really like the artillery piece, is it Britains?
ReplyDeleteYes but I’m not sure what they are supposed to be. A couple of years ago I amassed a small artillery park with the idea of using them for Little Cold Wars. I use them anyway. They are sturdy and fit in with the aesthetic I am working with here.
DeleteGreat report Steve. I've always been a bit dubious about the sudden death variant, but for solo play it certainly speeds things up.
ReplyDeleteIt did speed up the game tremendously. I was able to finish the game at one sitting and write the report as I went. Interestingly (if that is a word we can associate with this topic) the game went the fifteen turns that the scenario called for.
DeleteAn interesting encounter.Looks like the rules gave a good game
ReplyDeletePW do give satisfaction. My intention is to play all the scenarios in Niel Thomas’ book and I intend to give a few different sets a turn for variety and balance.
DeleteVery pleased to see that you enjoyed using my rules ... and many thanks for your praise!
ReplyDeleteAll the best,
Bob
You are welcome
DeleteWonderful write up and table, Steve.
ReplyDeleteWhat do you take to be the reason for the lack of dramatic crescendo / last stand in this game (which isn't necessarily a bad thing, of course)? The differences in rules? Scenario? Combination?
I am not sure. The scenario calls for equal forces to attack simultaneous targets so this might reduce the chances of the dramatic show down. In this case there was just a simple, dull wearing,out at the end as each side gave up trying. I found in these rules that actually crossing the ford was a bad idea in itself without somehow suppressing troops on the opposite bank. I am thinking aloud here. I would like to see someone else try out the scenario and see what they think.
DeleteWell you've got me tempted! However, I wonder if I play it using my preferred rules for OHW scenarios (my modified Morschauser's Moderns) what kind of result I'd see. Like PW, Morschauser has the rule about not firing when in a river (since Bob Cordery was the editor on the John Curry edition, I suspect he may have taken inspiration from that?), so at least that much would be similar. If I play it, I'll post it!
DeleteCool, I look forward to it.
DeleteI played this a number of times - with medievals, however. This made for lots of actual fighting at the fords and OHW allows [and I do too] you to fight across a bridge or a ford giving the 50% benefit to the defender. However, they grant no defense from shooting so it is of use to bring up ones Archers and skirmishers if you have any.
ReplyDeleteThis is a good time to raise some of the issues with using the OHW with other sets of rules. As Dale Hurtt of http://daleswargames.blogspot.com/
has been noting with his play of the actual rules, all the factors of distance, attrition, shooting ranges, 15 turns, have been made with NT's OHW mechanics in mind. So if you introduce any changes it might upset the balance. For example, infantry move 6" in all OHW rules, and Cavalry 12". If Infantry move 4" in a set of rules you use with a OHW scenario, you may need to make it a 20-Turn game as the most common troop type is moving at 2/3 original speed.
So in the scenario, the entire Red force appears on turn 1, followed by the entire blue force on turn 1. It may have helped if you entered the entire force of both sides onto the board, then switched to the card driven system.
Note that in OHW all Units can act every turn. If you switch to an activation system whereby on average half the units activate every turn, the game may need more turns for players to build up their forces and act on their plan.
Hope that is helpful. I play both types of activation systems, and they both have their place, but they force changes upon scenarios.
For the scenario I used the PW ‘Brown Book’ rules. Since I haven’t played in ages I used them as written, including the solo-activation system, just to see what happened. Scarlett and Schwartz both recounted in their post-memoirs that having firepower available was vital in order to successfully seize bridgeheads. Units that failed were punished badly and I think PW illustrated this historical reality very well. The Teutonian tank fished out of the river is currently being renovated I understand to bring it back into running order.
Delete