Saturday, August 29, 2020

Bridgehead

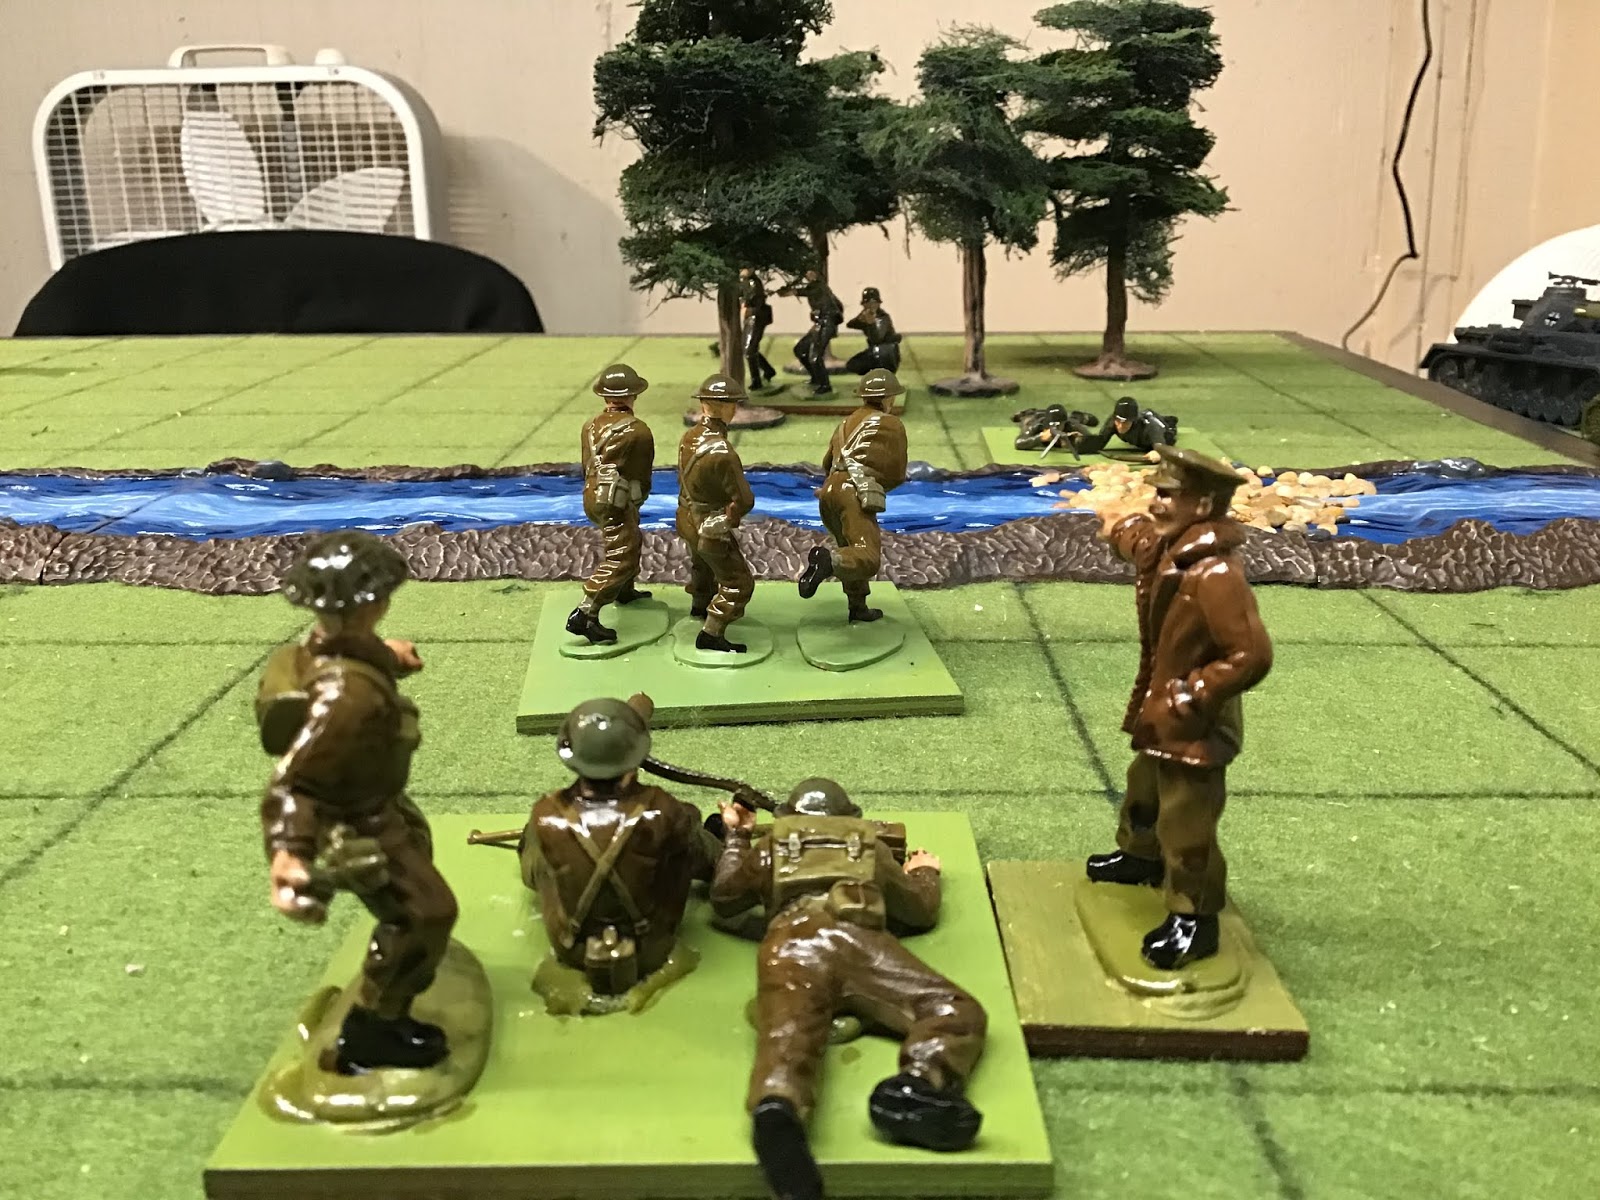
Teutonic forces were by now overwhelming Albionian defences. At the Running River however it’s soldiers faced a problem in being able to secure a crossing. However, one bridge offered a chance for a bridgehead from which to continue their advance. Piecemeal, a lead platoon dashes over the bridge before the Albionians could mount a counter attack.

The battlefield

Teutonia

Commander

3 Platoons of 3 units each.

1 Section Mortars.

2 Medium Anti-tank Sections.


Meanwhile, Albionian forces were quickly made aware of the Teutonian intentions due to a small section of infantry watching the nearby bridge. Before long, reinforcements from all quarters were on their way to the rescue.


Albionia

Commander

4 Platoons of 3 units each.

1 Section Mortars.

1 Tank Troop.


Turn 1 

An Albionian Platoon (1st) appears from the west with a mortar section). The Teutonians draw a 5 and 2 units head for the woods.


Turn 2

The Teutonian’s draw a 6! The 2 units push ahead and engage the enemy (I am playing sudden death - blood thirsty am I). They roll a disappointing 3 vs the mortars. Meanwhile, the Teutonian mortar section appeared and quickly moved to the bridge.


Turn 3

Devil take it. The Teutonians drew a 6 again! Sadly their marksmanship drew a blank again. The rest of the force moved up. More Albionian infantry reached their jump off points.


Turn 4

A joker means the cards are shuffled. Maybe the Albionian luck will change? Nope, the Teutonians once more draw a 6. More shots are exchanged and more men head for the bridge. Finally, the Teutonians hit the mortars and remove them from the battle.


Turn 5

Finally the Albionians draw and 8. The rest of the Albionian defences turn up. Including a tank. Within a twinkling they advance and attack the wood. Meanwhile the second Teutonian anti-tank section is blocked from entering the battlefield.


Turn 6

A Joker forces a card reshuffle. Now the Albionians draw a 6 and they continue their advance. This time the hapless Teutonians are blasted out with two 5s to hit and 1 and a 2 making two dead infantry. The last of the Teutonians have arrived but are stuck behind the anti-tank guns!


Turn 7

Another Joker. Albion draws a 6 and continues its relentless advance. The Teutonian mortar team get a nasty shock!


Turn 8

The Teutonians now have a chance when a black 7 is drawn. Wisely or not the rest of their force rushes for the bridgehead.


Turn 9

The Teutonian gamble pays off when they draw a 5. The mortar moves back a little and let’s fly (2 = miss). The infantry however eliminate the infantry they were aiming for.


Turn 10

Albion draws an 8. Two platoons are moved up whilst there is continuing skirmishing around the wood.


Turn 11

Teutonians draw a 7. As they advance, the lead Albionian section is forced to retreat. The majority of the Teutonians are across the river. This will make things hard for the Albionians to repel them.


Turn 12

Teutonians draw a 6. Their marksmanship is uncanny and two more Albionian infantry units are removed from action.


Turn 13

Albion draws a 7. A plucky section close assaults the spearhead of the Teutonians in the flank and win the scrap. The Albionians then charge at the enemy beyond them and chase those off. Naturally there is a pursuit, but this time both sides roll a 5 and both sides are eliminated! This gives the rest of the Albionian force a chance to advance.


Turn 14

It was time to check for exhaustion points. The Teutonians started with 12 units but now only had 7. They were close to exhaustion. The Albionians began with 14 units but still had 9, but they still had to remove thenTeutonians from the bridgehead. The Teutonians drew a 7.  They made the best of it by eliminating one of the units from the Albionian left flank platoon. Meanwhile, the mortar destroyed another from the center platoon, narrowly missing the Albionian commander. The Teutonian commander joined the firing line and removed yet another infantry unit.


Turn 15

The deadly fusillade halted the Albionian advance in its tracks. They had now reached their exhaustion point. Even though they drew an 8, all they could do now was to fire desultory shots at their enemy. The Teutonians had won again!


I used Portable Wargame Modern Vanilla with the sudden death option. Does this make a short, vicious, uncertain game? Yes. Your point? The OHW scenario list provided the battle. The only change I made was to turn the units into three units. My thinking was that each would represent a section within a platoon. This might have created an infantry heavy battle, but then I was playing a infantry company level game. There were supporting arms, but with the exception of one mortar team, they did little. The Teutonians had their usual luck. I am impartial but I think it is time for an Albionian win, don’t you?


Monday, August 24, 2020

New Acquisitions

There is a stirring...


I’m building up my armies after a long pause. The mortar team is going to be joined by another later this month, meanwhile the CTS infantry above have been boiled, adjusted, cooled and washed ready for priming. I may run a few posts on the topic.

Monday, January 20, 2020

Take the High Ground

“Take the high ground”. These were Captain Scarlett’s latest orders in the ongoing campaign to repel the Teutonians from Albionia’s green and pleasant land. The Teutonians had recently captured and occupied a prominent hill next to a main road that ran in the direction of the enemy invasion. If the hill could be taken, then it would be easier to thwart and advance.  Company A was going to be fully committed with the HQ and all three rifle platoons. In addition, battalion and brigade had loaned a mortar and a heavy machine gun (HMG) section respectively.


Meanwhile...

Franz and Willi shivered in their foxholes staring down the valley. Their platoon along with another were dug in and concealed.  Reinforcements were supposed to be on the way, but nevertheless, Willi made some stupid comment about “vanting to be home in der Farzerland”. Franz cussed him out. “Don’t you know zat ven ever anyvon says dat, der Albionian pig-dogs attack?” He would have felt better if he had known that a mile or so behind, Kapitan Schwartz, along with another remaining platoon, a HMG section and an infantry gun were on their way. The enemy must not be allowed to seize the hill. And just to help out further a battery of cannons were available for support.

For this battle I decided to go back to ‘Up the Blue’. The scenario is the fourth in OHW and I have been reading up on tactics to better understand potential strategies for both sides. I decided that Scarlett would probably use a gambit move with one the platoons, with two behind in a triangle formation. The rest of the force would be in reserve until contact was made, possibly working around the hill.  Meanwhile, Schwartz’s men on the hill would stay hidden until they saw the whites of the enemy’s eyes. The reinforcements would attempt to use their firepower to prevent the hill garrison being overwhelmed.

Turns One and Two
The Albionians fanned out as the Teutonians on the hill stayed put. Schwartz appeared on the horizon, but so far there was no action.


Turn Three
Schwartz won the initiative and let fly with the infantry gun at the Scarlett’s 3rd platoon with two hits. Great start. His HQ platoon, complete with an artillery forward observer (FO) moves towards the woods along with the HMG section. But not so close as to be in line of sight (LOS) of the Albionian HMG.

Scarlett’s entire company boldly advanced on the hill. 2nd platoon switched to ‘tactical’ moves, but since they could still no see the enemy they could not fire unless the Teutonians did. Meanwhile, 1st platoon attempted to sneak around the hill. The mortars opened fire on the infantry gun but only inflicted one point of damage.

Albionian’s A Company prepares its assault

Turn Four
Scarlett had the initiative this time. It was time to finally attack the hill. 1st platoon advanced and were fired on by the Teutonians (3, 5, 6, 6 + 1,  3, 4, 6 = 5 hits). Since this was in the same volley from two separate units I counted this as one attack and therefore the unit received a permanent hit (a higher level of severity, this limits a units ability to rally to full strength and its combat ability). 2nd platoon reacted weakly with one dice (3 - 1 vs dug in -1 for the permanant hit) and scored no hits on the enemy. But, at least Scarlett knew where the enemy was now! 1st and 3rd platoons moved forward but could still not see past the crest in order to attack.

Schwartz ordered his FO to contact the Medium Battery to the rear to fire on the nearest large enemy unit, 3rd platoon. They roll 4 dice (1, 2, 4, 5 for 2 hits). The rules say that the number off attack dice goes down by the number missed the next time it fires.  Schwartz then ordered the gun to fire smoke on the enemy HMG whilst his HMG ran into the woods.

2nd Platoon’s foolhardy assault

Turn Five
Things were not going right for Scarlett. Schwartz won the toss and the chaps on the hill blazed away at poor old 2nd platoon (3, 3, 4, 6 = 2 hits; 1, 2, 5, 5 = 2 hits). 2nd platoon dissolved and fell back in full disorder towards the field latrines. The FO ordered in another salvo, only 2 dice but a 2+ would be a hit for firing on the same target (4 and 6 = 2 hits). 3rd platoon were not happy. The infantry gun joined in (two 4s) platoon ran after 2nd platoon!

Scarlett was hopping mad!

Scarlett was now hopping mad. As fugitives ran past him he focussed the remaining platoon to work around the western side of the hill as the mortar and HMG engaged what they could. The HMG fired on Schwartz and his platoon inflicting just one hit, but the mortar added another two. It was time to get under cover. Meanwhile 1st platoon swung around and attacked the western most foxholes on the hill. Albionians had 3 dice - 1 for fighting against dug in troops but another 1 for being in ‘touch’ and since they were fighting against the rear of the enemy they needed only a 3+ to hit. Conversely, even though the Teutonians had four dice, they needed a 5+ to hit back. Albionians (3, 6, 6 = 3 hits), Teutonians (4, 6, 6, 6!!!). Even honours.

Turn Six
The gods of war favoured Kapitan Schwartz as yet again he won the initiative. The beleaguered Teutonian platoon on the hill returned fire on 1st platoon (1, 2, 2, 6 = 1 hit). The FO ordered artillery on to the enemy HMG (5, 6 = 2 hits). The gun turned its attention to 1st platoon and inflicted a hit on them. Schwartz finally decided that he needed his main efforts on the western side of the battlefield.

What could Scarlett do? 1st platoon were reluctantly pulled back in the hope they could be rallied. The heavy weapons units however were presented with a juicy target as Schwartz moved his reinforcements across the road (HMG 3, 4, 6 = 2 hits, mortar 5, 6 = 2 hits!). Once again, Schwartz had a whole unit dissolve around him. The odds were now even.

1st Platoon assaults the hill

Turn Seven
Or at least they would have been if Schwartz didn’t have the luck of the devil. A new FO link was set up with a platoon on the hill. The Teutonians fired at the Albionians trying to fall back (2 hits) and 1st platoon melted away. Finally, the infantry gun lobbed a shell at the Albionian HMG (5, 6 = 2 hits).

The infantry gun swings into action

This was the point that Scarlett stared in disbelief at the mess that the attack had become. He had an intact infantry platoon and mortar section, but the HMG section had taken a lot of damage. With the enemy still firmly ensconsed on the other side of the hill crest it would take a miracle. The HMG section rolled a Quality Test and won a hit point back. The mortar sent off a round towards the infantry gun and scored 1 hit.

Turn Eight
Schwartz once again won the initiative. The FO called down the medium artillery, this time on Scarlett and the HQ platoon (2, 6 = 1 hit). The artillery only had ten more rounds at this point. Meanwhile the infantry gun inflicted two hits on the poor HMG section, only one more hit and they would be gone too!

Courageously (foolishly?) Scarlett led the HQ platoon forward. The mortar section laid on smoke. This was going to be a do or die mission.

Scarlett’s HQ platoon advance

Turn Nine
No luck Scarlett. Initially, the Teutonian FO called down fire on the Albionian HMG who finally disappeared.  The dug in Teutonians fired on Scarlett as he urged his men forward. Despite the smoke, damage was inflicted (4, 5 = 2 hits). The infantry gun added to Albionia’s woes by attacking their mortar section (5, 6 = 2 hits).

With a mighty cheer, HQ platoon assaulted the hill (1, 3, 3 = 0 hits!). At least the mortar was able to score one on the other Teutonian unit on the hill (I had decided that the Teutonians were getting all the breaks here and allowed the mortar one dice despite them being technically behind the crest of the hill).

Turn Ten.
Finally Scarlett won the initiative. This time the HQ platoon rolled high (4, 4 and 6 = 3 hits). The mortar failed to work any magic this time.  Then. The Teutonian medium battery fired once again and the remaining Albionian heavy weapons were sent packing. The battle against Scarlett however was less effective (2, 2, 2, 6 = 1 hit). The other platoon however seized the moment and swung round into the flank of Scarlett and the gallant HQ platoon (2, 3, 4, 6 = 2 more hits).

Turn Eleven
Scarlett called for one more effort but it’s was futile (1, 2 and 2). Before he knew it, a guttural voice in his ear said “for you the var ist over”. Scarlett was in the bag!

What went wrong for the attackers? If anything why did everything go right for the defence? Constant futile frontal assaults obviously. Here I was role playing the situation of not knowing what was on the other side of the hill. On balance, the Albionian’s should have tried to envelop the hill under smoke cover, even though there was little room for maneuver on either side of the hill. The Teutonians were ruled to be dug in behind the slope and therefore were in a very strong position and the support of artillery ensured that the defense would be practically invulnerable. Add the fiendish luck of Schwartz in winning nearly initiative and it was inevitable that Scarlett would lose.

What about Scarlett? I think a daring escape attempt is in the offing.


Saturday, January 11, 2020

Control the River


Captain Scarlett had just been assigned another mission. The Teutonian advance had a least been slowed down in this sector and Brigade were working on a counter attack but it involved capturing two vital river crossings. Not only this, but he had to keep the enemy from using them either.  An anti-tank troop was to accompany him in order to consolidate the position. His old company was now back up to strength and both a mortar and machine gun section were going with them.

Kapitan Schwartz was intent on the coming action. Ever since the last engagement he could think of nothing other than striking back at the Albionians. The first two serious battles of the campaign had resulted in the almost complete loss of his unit. The invasion was briefly halted and a counter attack was imminent. Aerial reconnaissance had seen a build-up of troops near a river. Schwartz was now on his way to take control of a likely set of river crossings that the enemy might use.

In the first two engagements, I used a variant of One Hour Wargames called ‘Up the Blue’. I will almost certainly use these again in the future but wanted to take another old set out for a spin, Bob Cordery’s Portable Wargame. These rules are an almost direct descendant of Joseph Morschauser’s 1960s modern rules which some readers will know about. Changes were made to the grid. These would now use a 4” square. Also, PW includes a card based system to decide how many units can move. Finally, instead of an option using hit points, I would use the more ruthless ‘instant death’ option where units could be removed at a stroke. I apologize if I assume too much knowledge of the rules, but I know many readers already have copies. I hope others will enjoy the narrative. Once again, I am using the OHW scenarios, this time number three, Control the River.

Forces
Teutonian:  Kapitan Schwartz (6 points), 3 infantry units (12 points), 1 mortar unit (2 points), 1 machine gun unit (2 points), 1 tank unit (3 points) = Total 25 Points. Exhaustion level 3.

Albionians: Captain Scarlett (6 points), 3 infantry units (12 points), 1 mortar unit (2 points), 1 machine gun unit (2 points), 1 anti tank gun unit (2 points) = Total 24 Points. Exhaustion level 3.

A note on exhaustion points. Instead of a fixed number of turns, the battle continues until both units have lost half their number of units.

Turn One
Both sides were advancing from the northern and southern side of the river trying to beat each other to the crossings. This could be a violent and bloody encounter. A two of diamonds started the battle by giving Scarlett the ability to activate two units. One platoon was despatched to make a swift advance on either crossing.

The Albionians creep onto the field

Turn Two
A four of spades however meant that our friend Schwartz was able to launch even more men in the direction of the river. The tank unit made its way over the open ground on the west side with infantry support, whilst an infantry unit with a machine gun section skirted the woods to the east.

The Teutonians advance boldly

Turn Three
A two of spades. Schwartz had a difficult choice. He could urge the vanguard on or wait for the rest of his force to catch up. In the distance, the enemy appeared weak. Could he gamble on things staying that way? The lead tank commander decided the issues yelling “tanks forward”. The lead vehicle waded into the shallow water with the infantry following closely behind. This was a good start. Hopefully nothing bad would happen as the tanks could not fire as they crossed the ford.

The Teutonians armour splashes towards the enemy

Turn Four
A Joker forced a reshuffle and the next card was a two of hearts. Scarlett immediately heard that an enemy tank troop were advancing across the river. The anti-tank section were immediately despatched to the hill overlooking the river. In the meantime, the infantry would have to try and hold the enemy up as best they could. 1st platoon worked their way close to the ford and engaged with their anti-tank weapons. Albionians roll a 4, Teutonians roll a 1-1 for being the ford. Fortunately, the Albionians were nothing but a mischief, but nevertheless problematic.

Only to be held up...

Turn Five
A three of hearts meant that now Scarlett could engage the Teutonian armour with his AT gun and allow the infantry to withdraw. A roll of 1 however pathetically missed. The infantry might as well have stayed.  Meanwhile 2nd platoon advanced closer to the other ford.

Turn Six
A four of diamonds. The anti-tank guns once more tried to drive back the enemy tanks (1 + 1 for firing at the same target) but with no effect. 1st platoon was sent back to the river bank (D6 of 2 v D6 of 3-1) however failed to dislodge the Teutonians from their bridgehead. At this point, 3rd platoon and the mortar section arrived ready to support either of the other two platoons.

Turn Seven
A two of clubs. Finally. The tanks and 3rd platoon (for such they were) made an effort to force their way across. 3rd platoon set up positions to fire on the opposite bank (D6 of 2, why bother?). The Teutonians attacked (D6 of 3-1 vs D6 of 5!). The hapless Teutonians were soon balling out of their vehicles unde a hail of anti-tank rockets and bullets. At least one tank drove into the deeper water where it stayed for the next seventy years until it reappeared on a YouTube video.

And go into ignominy...

Turn Eight
A two of diamonds. Scarletts 1st platoon dashed along the bank to engage the Teutonians opposite (roll a 6 and a 2 for effect) the enemy infantry dispersed under the heavy fire. Scarlett took this opportunity to bring up the machine gun section with himself.

Captain Scarlett looks important

Turn Nine
A four of spades. A furious Schwartz urged his men on both at the eastern ford and where his tanks wallowed. The machine guns dashed through the dense woods and set up facing the ford and put the enemy guarding the southern side under fire (3D6 5, 5, 1 with two 1s for effect), who were either cut down or dispersed. 1st platoon then sharply moved towards the ford. Meanwhile Schwartz personally led 2nd platoon and the mortar section to repair the damage at the western ford.

Schwartz makes a last effort


Turn Ten
A three of spades. The Teutonian machine guns and 1st platoon moved down to the banks of the river. This was risky as the Albionian machine gun section was on the other side. However, first platoon were able to drive them back (D6 of 5 and 4 for effect) with Scarlett chasing after them. Meanwhile, Schwartz sent his mortars up to bombard the Albionians opposite (D6 of 6 then a 4) which forced them to retreat.

Turn Eleven
A four of hearts. Scarlett immediately began rallying his force against this sudden spirit of aggression by the enemy. To begin with, he ordered his own mortars forward to fire back (D6 of 1 no effect). 1st platoon pulled themselves together and returned and using long range effective fire. The Teutonian mortar crews hastily retreated but in the confusion lost much of their equipment and were no longer effective. Meanwhile, Scarlett urged his machine gun section into action and they soon had their tormentors in their sights (3D6 6, 6, 1 followed by a four and six) forced the Teutonian infantry back into the woods. 3rd platoon leapfrogged and sniped against the Teutonian machine guns who were in the open but with no effect (D6 of 3).


Turn Twelve
A three of clubs. The Teutonian machine guns pulled back to the woods alongside their 1st platoon who were skulking amidst the Larches. They defiantly brought the enemy under fire but with no effect.

Turn Thirteen
Three of diamonds. The plucky lads of 1st platoon splashed into the ford. The mortar team set up behind them and gave covering fire (D6 of 1...yay). 2nd platoon shuffled towards the East ford.

1st platoon cross the ford


Turn Fourteen
Two of spades. Schwartz and his men were not going to give up without some resistance. Deadly fire directed personally by Schwartz cut down most of the men of 1st platoon as they tried to climb the northern bank of the river. The machine guns in the wood also fired at the bank opposite with little noticeable effect (they rolled a 1).

Schwartz’s last stand. I think not.


Turn Fifteen
A joker reshuffled the pack and the last card drawn was the two of diamonds. The Albionian mortar section laid down deadly accurate fire on Schwartz and his men (D6 of 3, D6 of 3 for effect equaled destroyed). But once again, Schwartz was able to escape. The failing light meant that further action had to stop. But it was clear that the Albionians had control of the river crossings.

The remaining Teutonians hide in the woods


Unlike the other two battles, there was no dramatic crescendo or last stand. The card system ensured that whatever action was taken would be uncertain, wondering if the next card would allow that side to bring up enough units to make the push over the river. Under PW, can only move out of the river ford on their next turn and can’t fire. Therefore, crossing was a deadly business here. In this game, units were destroyed in the fords because they could not retreat. I wonder what others think Schwartz should have done?

I would like this moment to thank Bob Cordery of Wargaming Miscellany for his encouragement down the years and of course The Portable Wargame which you should buy along with all his other books.